Showing posts with label Cooking. Show all posts

Saturday, October 3, 2015

10 Freezer Meals in a Jiffy

After I used up all my meals from this post, I needed to make a few more to help me survive weeknights. Since I'm expecting baby #2, I am just so tired when I get home from work, and I don't feel like doing anything complicated. And I'll be honest, many nights I take a nap after dinner and hubby has one-on-one time with Ansel for an hour! Therefore, I knew I had to put a few more meals together to help me out on weeknights. I made less casserole-type dishes this time because they require more prep. I didn't repeat any expect for the chicken teriyaki, because it's so versatile (over rice,  over couscous, in tortillas, etc). Some of my inspiration came from this page on Southern Living, and some came from my Crockpot Bible, which I use constantly. I have several chicken dishes on here, but I always to try to mix them up with other meat dishes as well. *Note: a few of these I am trying for the first time, but I wanted to share anyway for the ideas!

Here's the dishes I prepped today:

  1. Chili
  2. Ham and Bean Soup
  3. Beef Mesquite Wraps
  4. Teriyaki Chicken
  5. Chicken-Sausage Pilaf
  6. Cheesy Chicken
  7. Peachy Pork
  8. Three Cheese Baked Penne
  9. Buffalo Mac N Cheese
  10. Tuna Casserole 


1. Chili
Follow your favorite recipe! Freeze in gallon freezer bags. Thaw the night before and heat in saucepan. Serve with  your favorite cornbread.

2. Ham and Bean Soup
3 cups dried beans (prepared); or 3 cans of navy beans, great northern beans, and garbanzo beans
1-2 cups leftover ham, chopped or slice in bite-size pieces
1 chopped onion or 2 T minced onion
Garlic to taste
Salt and pepper to taste
Water

Combine all ingredients and add water as desired for soup consistency, around 2-3 cups. Freeze in gallon bag. Thaw and heat in saucepan to prepare. Serve with your favorite bread.

3. Beef Mesquite Wraps
1 package beef stew meat
1 package Mesquite instant flavoring
1 cup water

Combine in freezer bag. When ready to make, thaw overnight in fridge and cook in slow cooker 6-8 hours on low. Serve in tortillas with toppings as desired.

4. Chicken Teriyaki 
2-4 chicken breasts
6 oz pineapple juice
1/4 cup soy sauce
1 tablespoon brown sugar
2 tablespoons honey
1 tablespoon ginger
1 tablespoon garlic
1 tablespoon vegetable oil

Combine all but chicken in a gallon freezer bag and mix. Add chicken. Label and freeze. Thaw overnight in fridge and cook on low in crockpot 6-8 hours. Serve over rice.


5. Chicken-Sausage Pilaf
1 can cooked and diced chicken
1 lb sausage, cooked
4 cups chicken broth (or 4 cups water + 2 bullion cubes)
1 cup celery, diced
1 cup baby carrots
Salt and pepper to taste
1 cup uncooked rice and pasta mix (like Rice A Roni)

Combine all but rice and pasta mix in gallon freezer bag. Freeze. To prepare, thaw overnight in fridge and mix in rice and pasta mix. Cook on low 6-8 hours or high 3-4 hours in crockpot, until rice is tender. Do not overcook rice or dinner will be mushy!

6. Cheesy Chicken
4-6 chicken breasts
2 cans condensed cheddar cheese soup (or 1 can cheddar, one can cream of chicken)
1 tsp garlic powder
1 tsp parsley
Salt and pepper to taste

Combine all but chicken in freezer bag and mix. Add chicken and freeze. To prepare, thaw overnight in fridge and cook on low in crock pot 6-8 hours. Serve over pasta or rice.

7. Peachy Pork
2- 15 oz cans of peaches, undrained
2 pounds pork blade or top loin chop
1 small onion, chopped
1/4 cup packed brown sugar
3 tablespoons cider vinegar
1 teaspoon salt
3/4 teaspoon cinnamon
1/4 teaspoon red pepper flakes

Combine all but pork and mix well. Add pork and freeze. To prepare, thaw overnight in fridge. Cook in crockpot on low for 6-8 hours. To thicken sauce, mix 2 T cornstarch and 2 T water, then add to peach mixture (remove pork first). Cook on high 15 minutes or until sauce is thickened. Serve over rice.

8. Three-Cheese Baked Penne
1 lb penne noodles, cooked and drained
4 cups spaghetti sauce
2 cups ricotta cheese
1 cup parmesean cheese
1 cup mozzarella cheese
Panko crumbs (Italian seasoned)

In saucepan, combine spaghetti sauce, ricotta, and parmesean and cook until blended. Pour over penne in a 9x13 disposable pan. Stir to combine. Sprinkle mozzarella cheese and then Panko crumbs over dish. Cover pan with tinfoil and seal well. To prepare, thaw overnight in fridge. Bake at 350 for 30-45 minutes, or until browned and bubbly in center.

9. Buffalo Mac N Cheese
2 cans condensed cheddar soup
2 cups milk
1 tablespoon dried minced onion
Salt and pepper to taste
1-2 cups shredded cheddar cheese
1 lb macaroni noodles, cooked and drained
2 cans cooked chicken, buffalo flavor

In large bowl, combine soup, milk, minced onion, and 1 cup cheddar cheese. Mix well. Pour over noodles in a 9x13 disposable pan and stir to combine. Dump chicken evenly over top of noodles. Top with additional cheddar cheese. Cover pan with tinfoil and seal well. To prepare, thaw overnight in fridge. Bake at 350 for 30-45 minutes, or until browned and bubbly in center.

10. Tuna Casserole 
1 lb cavatappi pasta, cooked and drained
12 oz can tuna
1 cup frozen peas
1/2 cup butter
1 can cream of mushroom soup
2 cups milk
1 chicken bullion cube
2 cups cheddar cheese (optional)
Salt and pepper to taste
1 tablespoon dried chives
1 tablespoon dried parsley
Panko crumbs
Parmesean cheese

Combine pasta, tuna, and peas in 9x13 disposable pan. Combine butter, soup, milk, bullion, salt and pepper, chives, and parsley, melting in microwave until blended. Pour over pasta mixture and stir to combine. (Note: if you like it cheesy, add 2 cups of cheddar cheese at this step) Top with mixture of Panko crumbs and parmesean cheese. Cover with tinfoil and freeze.To prepare, thaw overnight in fridge. Bake at 350 for 30-45 minutes, or until browned and bubbly in center.


Please let me know if you tried and liked these recipes, or if you adapted any to suit your needs! Happy freezing!!

Monday, June 1, 2015

Easy, No Bake, Fiber-and-Protein Filled Granola Bars!

Summer's here and that means more time to experiment in the kitchen for this teacher! So I tried these granola bars, and they aren't for the faint of heart. Chewy, nutty, sweet-n-salty goodness explode from this yummy bar. While they aren't low on calories or sugar, they do have a lot of other good stuff in them- oatmeal, flax seed, chia seeds, nuts, and sunflower seeds. You could certainly add more chia seeds or flax seed if you wanted to. I haven't tried substituting corn syrup for honey, but I'm sure you could do that as well. The best I could determine, one bar (recipe makes six) is about 360 calories with 4.5 grams of fiber and 7.5 grams of protein. You could of course cut into smaller pieces for smaller snacks.


Kate's Granola Bars

1. Line 4x8 loaf pan with aluminum foil for easy cleaning and cutting. Set aside.

2. In large bowl, mix to following and set aside:
1 1/2 c. oatmeal
1/4 c. sunflower seeds
1/2 c. crushed nuts (peanuts, mixed, whatever you like)
1 T. chia seeds
2 T. flax seed

3. In large saucepan, bring to boil and boil for 30 seconds:
1/2 c. sugar
1/2 c. Karo corn syrup

4. Remove from burner and mix in peanut butter, working quickly:
1/3 c. peanut butter

5. Working quickly, add oatmeal mixture and stir until completely covered. Pour out into loaf pan and let cool. Cut into six pieces (for calorie count above). Store in airtight container.

If desired, drizzle with white chocolate melting candy.

Thursday, October 9, 2014

Easy Oatmeal Bars

Looking to get your oats in but still have a sweet tooth? Behold! Easy Oatmeal Bars!! This easy recipe can be customized to your mood or the season with various fillings. Lately I've been experimenting with caramel and pumpkin, though the original recipe calls for jam. You could also use chocolate chips, applesauce, apple butter, strawberry jelly, peanut butter, nuts, raisins, Nutella, etc for the filling. It's not hard to bake and goes together fast. There's even a bit of sweet-salty thing going on from the butter in the crust. Mmmm!

Easy Oatmeal Bars
2 c. quick oats, uncooked
1 3/4 cup wheat flour (or white)
2 T ground flax seed
1 c. firmly packed brown sugar (or make 1/4 cup of that honey)
3/4 tsp salt
1/2 tsp baking soda
1 cup real butter
1 to 1 1/2 cups of your choice of filling

Combine oats, flour, flax seed, brown sugar, salt, and baking soda in large bowl. Melt and stir until the mixture is crumbly and butter is evenly dispersed. Press 2/3 of mixture firmly in the bottom of a greased 9x13 pan. Spread filling evenly over crust, then sprinkle remaining crumble mixture over top. Bake at 400 for 25-30 minutes, or until golden brown. Let cool and cut into squares.

Filling note: Try 1 cup of old fashioned caramel as filling. Or, mix 1 c. pumpkin plus 1/4 cup sugar, 1/4 tsp ginger, 1/4 tsp allspice, and 1/4 tsp nutmeg and use as filling. I even did a pumpkin-caramel filling and it was delicious!!


Pictured below: Old fashioned caramel with chocolate chip filling

Tuesday, September 9, 2014

Saving Time as a Busy Mom

Going to back to work this fall has been full of mixed emotions. I do enjoy my job and I feel like I get blessed with great students year after year. Yet I miss Ansel while I am gone, and I still have to keep up with all the everyday tasks that were easier to stay on top of before our precious little one came along. Justin is also finishing his last year of PTA school, so this adds some stress into the mix since he is gone two nights a week and has studying to do when he is home. Before he was in school, we basically split all our duties in half since we both worked (I know, pretty progressive, right?) Now, he has school and I have Ansel to feed, so it's still basically split, although I am trying to do as much as I can to help him since his evenings are more structured than mine. (By the way, I swear I could write a dissertation on the difference between scheduled responsibilities and flexible time to get things done.)

With all that said, here are a few things I am doing to keep myself partially sane.
  • Make freezer meals on the weekends for the next week.
  • Make two of everything so that I have leftovers and don't have to cook two nights in a row. 
  • Buy meat in larger quantities and divide them into small portions and freeze. 
  • Cook (boil) chicken ahead of time and shred or chop for easy meal prep. 
  • Limit grocery shopping trips by keeping a list and only going to the store once a week.  
  • Designate one day a week for house cleaning (sweeping, dusting, bathrooms, laundry). 
  • Pack lunches the night before. 
  • Pack pumping supplies the night before. 
  • Pick out clothes the night before. 
  • Cook a dozen scrambled eggs Sunday night and store in the fridge so I have a healthy breakfast each morning.
  • Split duties with hubby. Me: dinner, dishes - Him: trash, mowing - Both: laundry, other chores
  • Keep up with my social life (phone calls, texts to close friends, Facebook stalking...haha) while nursing. 
  • Be efficient in my work at school so that when I am home, I can focus on my hubby and babe. 
I am feeling pretty tired in the evening though, and I'll admit that I fall asleep nursing sometimes. It's sure hard to get to bed before 10 PM with getting all three bags ready (school bag, pumping bag, diaper bag) and everything else, but I am really trying. At least Ansel is sleeping like a champ 8:30-9 PM to 6 AM. My daily schedule looks something like this:

5:20 Rise and shine!
6:00 Nurse Ansel
6:45 Finish getting ready while Justin burps and changes Ansel
7:10 Drop Ansel off at sitter's
7:30-3:00/3:15 Work
3:30 Pick up Ansel
3:45-5:00 Get dinner ready, eat, clean up
5:00 Nurse Ansel and play with him
6:00 Housework, leisure, bills, etc
7:00 Exercise at least 3x a week
8:00 Nurse Ansel
9:00 Get ready for next day, read Bible
10:00 To bed!

What do you do to save time while working and raising a family?  I'm definitely looking for suggestions to better maximize my time.

Sunday, August 24, 2014

Canning Season Totals 2014

This post may be slightly premature, but I'm SO stoked about how much I was able to preserve this summer, I have to write about it. It's been crazy busy with Ansel, but luckily my mom is here and has helped me with a lot of it. Some I have done bits at a time, while others have been a massive haul in one day. My garden definitely didn't perform like I wanted it to. I planted green beans, zucchini, tomatoes, peppers, peas, cucumbers, a melon, and gourds. The green beans did well until something started eating the leaves off; I canned maybe half of what I did the year before. The peas looked awesome until...something ate them. The zuchinni did great, though they had their share of blossoms and even leaves eaten. The tomatoes are still going, but I swear they are ripening one at a time. (Because of this, I bought 50 lbs at Meijer and used those) Nothing happened with the cucumber or melon, though I have a wonderful friend who gave me some of her too-big cucumbers. A few gourds are growing on the fence. Even with all that, here's the totals:

25 half pints of salsa
8 pints of tomato juice
15 pints of spaghetti sauce
43 quarts of green beans (about half are from my mom's garden; of these she canned some for me)
8 half pints of cinnamon sticks + 5 pints of cinnamon rings
8 half pints + 2 pints of lemon-lime cucumber spears
17 quart freezer bags of shredded zucchini
7 quart freezer bags of strawberries (from my mom's)

I still had some frozen apples and corn left, as well as some green beans and tomato sauces. I'm pretty well stocked. I love knowing what is in my food!!!! I might have a few more items to finish up into fall (apples and tomatoes) but the bulk of it is done. Whew. About time to prop my feet up!


Friday, June 20, 2014

Taco Casserole

A few nights ago we had tacos, with Spanish rice to go along with them. But I always make too much rice... so needed to use it up. I came up with: Taco Casserole! I just used the leftover rice, and cooked up some thin-sliced pork for the meat. Depending on how much you have left will depend on the size of the pan you use. My pan was 7x7 or so. I made it in the morning and then put it in the oven when I started to feed my baby, so I could have it cooking at the same time. I bet this would be an easy casserole to freeze too. Perhaps the best thing is that you really don't have to worry about the proportions of the ingredients!

Taco Casserole
1-2 cans refried beans
2+ cups of leftover Spanish rice
1/2 + pound taco meat- pork, chicken, beef, etc
1 + cup salsa
cheddar cheese

Layer ingredients with refried beans on the bottom of your casserole dish, then rice, meat, salsa, and cheese on top. Bake in oven at 350 about 30 minutes or until warm in center.

Thursday, June 5, 2014

Crunch Bar Cookies

It's the fourth week since baby was born, and I'm starting to find time to cook a little! It's nice to feel like life is adjusting to somewhat of a new schedule. More on that later... let's talk about food!

My favorite cookie recipe from my mom has pudding in it to make it super moist. I happened to pick up a bag of Crunch bars on sale, and decided I would use them instead of chocolate chips this time. What a good decision! They had an awesome little crunch factor that really upped the texture of the cookie. I thought I would share the recipe since I downed about a dozen all by myself. (Oops, did I just admit that?) Next time, I am going to do the same thing, except for add chunks of caramel too.
Crunch Bar Cookies

1) Beat until smooth and creamy:
1 c. butter
3/4 c. light brown sugar
1/4 cup white sugar
1 package chocolate pudding mix (4 serving size)
1 tsp. vanilla

2) Beat in:
2 eggs

3) Gradually add:
2 1/4 c. flour
1 tsp baking soda

4) Mix in:
1 1/2-2 cups Crunch bars, chopped into small squares

Batter will be stiff. Drop by rounded teaspoonfuls about 2 inches apart on an ungreased cookie sheet. Bake at 375 for 8-10 minutes. Let cool slightly before devouring! Don't burn your tongue!

*You can also use vanilla pudding to make classic chocolate chip cookies, and have fun experimenting with white chocolate chips and peanut butter chips.  

Friday, May 30, 2014

Using overripe bananas

In spite of my best efforts, I always seem to have bananas going bad. I use them in smoothies and eat them plain, and bug my hubby to eat them, but they just don't get used quick enough. I thought I would look for a recipe besides banana bread to use them, and I found one for banana cookies with oatmeal. Score for a slightly healthier cookie option!

I mixed up the recipe, which you can find HERE, and it wasn't very stiff for cookie dough, so I put it into a 9x13 and an 8x8. Glad I did, because when I baked it, it did end up more like bread.... but hey, at least I used the bananas and got some oatmeal in there too. Maybe my bananas were too ripe? Or bigger than standard? Not sure. I wish I could find a good recipe for cookies made with bananas.... this one tastes great, it's just not cookie texture.

Friday, May 2, 2014

Date (fruit) Brownies

I wish I could say this post about brownies was unrelated to pregnancy, but it's not. Apparently research has shown that women who eat dates in the four weeks preceding their due date seem to have a larger cervical dilation, along with other positive features (see article here). Of course I'm only two weeks out from my due date, but I thought, hey, it couldn't hurt! So I found a recipe online. Many of these date brownie recipes are from raw foodists or gluten-free, which is great if you are trying to be healthy. The recipe I tried calls for a cup of dates (processed down in a food processor) to sweeten the brownies. Easy to make and I thought they came out pretty good. More on the chewy than the fudgy side (did I overcook maybe?), but I still liked them. As a bonus, I melted down chocolate chips while the brownies were still warm for a yummy topping.

Here's the recipe. I did use regular flour because I don't have almond flour. 

I'm not in labor yet, but of course I haven't finished the pan yet either. Give me another day or so, okay? LOL....

Tuesday, March 11, 2014

Super Healthy Blueberry-Kale Smoothie

This smoothie may take some getting used to, especially if you are used to all-fruit smoothies. But it's definitely worth it. When I first tried adding kale, the color got to me, so I figured out that I could add blueberries to make it a purple-ish color instead of greeny-brown. Plus, the blueberries help with the taste too, along with the banana. With my Brewer pregnancy diet, I started adding Greek yogurt and flaxseed too. So here's the recipe- give it a try!

Blueberry-Kale Smoothie
1 small banana
1/2 cup frozen blueberries
1 cup Greek yogurt
7 baby carrots
1 large handful of kale (maybe a cup pressed down?)
1 tablespoon flaxseed
 
Place ingredients in blender and liquefy. Add more blueberries or ice to desired texture. Enjoy the energy!

Approximate Nutritional Breakdown (I am not an expert).....
Total: 430 calories, 5.5 grams fat, 9 grams fiber, 31.5 grams protein, 10% potassium, 10% magnesium, 100+% vitamin A, 100+% vitamin C,  25% calcium, omega-3's and lignans

For serving size mentioned above....
banana- 100 calories, .4 grams of fat, 10% daily potassium, 3 grams fiber, 1 gram protein
blueberries- 45 calories, .25 grams of fat, 10% daily vitamin C, 2 grams fiber, .5 gram protein
Greek yogurt- 140 calories, 0 grams of fat, 25% daily calcium, 0 grams fiber, 24 gram protein
carrots- 40 calories, 0 grams of fat, 100% daily vitamin A, 2 grams fiber, >1 gram protein
kale- 50 calories, .6 grams of fat, 100+% daily vitamin A and C, 0 grams fiber, 3 gram protein
flaxseed- 55calories, 4.3grams of fat, 10% daily magnesium, 3 grams fiber, 2 gram protein, omega-3 & lignans

Tuesday, March 4, 2014

Easy Bacon Carbonara

I was getting low on meat options, but had bacon in the fridge... and I remembered how Cheesecake Factory has a delicious carbonara dish that I frequently get... so I thought I would go for it. After researching chicken carbonara recipes, I adapted to what I had in my fridge. It turned out to be tasty!


Bacon Carbonara

6 oz. whole wheat thin spaghetti noodles
6 slices bacon, chopped into small pieces
2 tsp. minced garlic
1/2 tsp basil
1/2 tsp parsley
4 oz cream cheese
1 egg
3/4 c. milk
3/4 c. grated parmesan cheese
1 c. cooked peas

1. Start water boiling for noodles. Add noodles and cook until done.

2. Meanwhile, sauté bacon pieces, garlic, basil, and parsley in a skillet till bacon is crispy. Set aside.

3. In separate mixing bowl, whisk cream cheese, egg, milk, and parmesan cheese until well combined.

4. Place cheese mixture in the same skillet that you cooked the bacon in, and stir over low heat until mixture is well blended. It will begin to thicken as you stir. When mixture is creamy, add warm peas and bacon mixture. Stir together to blend flavors.

5. Combine warm noodles and sauce in serving bowl and serve with a garnish of fresh parsley or parmesan, if desired. Yum!


Saturday, March 1, 2014

Crockpot Sausage Meatball Soup


Along the theme of more protein, like I blogged about earlier, and since it's still chilly on this March 1, I decided to try to be creative with the sausage that I had waiting to be used in the fridge. I also had beans in the pantry, so I decided to combine both for a hearty soup. I thought it turned out great, and my hubby when back for a second bowl. Here's the recipe:

Crockpot Sausage Meatball Soup

Sausage Meatballs
1 lb sausage
1 egg
10 finely crushed crackers
2 T milk

Mix above ingredients well. Form into 1-inch balls (use a cookie scoop for a shortcut). Brown all sides of meatball in a skillet.

Soup
3 cans of your favorite beans (I used cannellini, great northern, and black)
1 tsp garlic powder
1 tsp onion powder
1 tsp pepper
1 cup water

Combine all ingredients in crockpot and mix well. Add browned meatballs and cook on high 4-5 hours. (You can easily make this soup serve more people by adding extra beans and seasonings.)Garnish with parsley if desired and serve with cornbread. Enjoy!

Tuesday, February 18, 2014

The Brewer Pregnancy Diet: More Protein!

As I've referred to in past posts, Justin and I completed The Bradley Method classes for our childbirth training. One of the things I really like is the comprehensive approach that they take to pregnancy, because it seems to me that many things affect the birth experience and developing baby. Of course, one crucial element is what you eat during pregnancy. While the Brewer Pregnancy Diet is a little different than my normal routine, I've been very pleased with how I feel. But let me back up to the start of my pregnancy and work from there.

When I got pregnant in early August 2103, I was training for a half marathon. I had to eat good food, or I wouldn't feel well enough to put in the mileage I need to for training. At that point, I ran 3-4 times a week, anywhere from 4 miles on "short" runs to 8-10 miles on Saturday long runs. Here's a sample day before the Brewer Diet...

Breakfast: scrambled eggs with cheese, orange juice
Lunch: sandwich (peanut butter/jelly) on 2 slices of whole wheat bread OR plain tuna with crackers, apple (or another fruit)
Dinner: chicken casserole (chicken, rice or noodles, sauce), green beans, brownie
Snack after run: 12 oz (ish) smoothie (banana, frozen fruit, carrots, flaxseed [sometimes kale was included])

I think a strength is that I always got my servings of fruits and veggies (though more fruits than veggies usually) but a weakness is that I pretty much always had something for dessert, and didn't have as many whole grains as I should have.

Bring in the Brewer Diet around 20 weeks, right about Christmas time, when we started classes...

I'll let you check out the link for specifics (http://www.drbrewerpregnancydiet.com/id96.html), but it big idea is that I needed to up my protein from around 40-50 grams to 80-100 grams a day, and add  more greens and milk products. Now, I like meat, but getting 80 grams of protein a day is a real challenge. I'm sure that I don't get there every day, but I am really trying to! So I've tried to start adding things to my diet to up my protein that are high-count protein without wasted calories. Here are some of the protein sources I have been adding:
  • Cheese - 7 grams in one slice. I love the following because it's so convenient:  http://www.landolakes.com/product/44815/-snackn-cheese-to-go-co-jack-snack-cheese
  • Greek yogurt - about 20 grams in one cup, added to smoothies, soups, tuna or mashed potatoes
  • Peanut butter- 7 grams in 2 tablespoons. Not the most effective source with extra sugars.
  • Almonds- 7 grams in 1/4 cup
  • Protein-rich granola- 10 grams per 1/2 cup. http://www.naturevalley.com/Snack-Bars/OatsHoneyGranola 
  • Chicken, pork, tuna, ham-20-25 grams in 3 oz
  • Potato with skin- 5 grams per medium potato
  • Pinto, navy, kidney beans- 7 grams per 1/2 cup. I make chili or bean soup pretty often.
  • Eggs- 6 grams per egg. I've recently made deviled eggs because I'm getting sick of scrambled!
  • Oatmeal- 6 grams in 1 cup cooked. I also add oatmeal to cookies, brownies, etc. if my sweet tooth calls, though I try to limit my sweets.
To be honest, I just feel like I am eating SO MUCH. Way more than usual. And commenting on weight gain during pregnancy, I didn't gain anything for the first four months (16 week or so). Over the last three months (now I'm 28 weeks), I have gained about 20 pounds, which is right about average recommendation. The interesting thing is that I think it's all in my belly and breasts, I mean, I haven't had the legs of my pants getting tight. Hopefully I will be able to keep it at about 30-35 total to the time I give birth.

One another note with the whole diet thing, I have still kept up exercising even after the half-marathon was over at 7 weeks pregnant. I continued to run until about 24 weeks, at which point the pressure on my bladder just made running uncomfortable. So I have been walking three times a week, and doing strength training exercises at home like squats, lunges, and arm weights. I think this helps a lot with how feel overall.

I have to say: I'm feeling good. Looking back so far, the biggest issues have been the mood swings during the first trimester, a few headaches during second trimester around 15-20 weeks, and trying to get comfortable to sleep throughout. I haven't had any morning sickness though or many other issues. As for the headaches, I think those might have been caused somewhat from stress at work, the holiday business, or perhaps just fluctuating hormones. Whatever it was, they are gone now, and I think that it might be due in part to the diet changes. I also think it's interesting that I haven't had any crazy cravings. I wonder if it's because I am getting the nutrients I need? Who knows... Since this is my first pregnancy, I'm learning as I go, and I thought I would share here in case it could help anyone. I'm not a doctor though, so please consult yours before trying anything! :)

Friday, February 7, 2014

Easy Homemade Chicken Noodle Soup

Since my hubby's been feeling under the weather (he didn't go to work or night classes for two days!) I decided to make homemade chicken noodle soup for dinner. I already had a chicken breast that I had boiled from earlier this week, so that part was taken care of. Just a few other ingredients that I usually have on hand, and shazam! it was tasty. So much healthier than the sodium-packed canned chicken noodle soup! Whole wheat noodles and lots of carrots step up the nutrition factor.


Easy Homemade Chicken Noodle Soup (serves 2-3)
3 cups water + 2 chicken bullion cubes (or 3 cups chicken broth)
1 tsp celery salt
1 tsp dried parsley flakes
1 cup chopped carrots
1/2 to 3/4 cup dry whole wheat spaghetti noodles, broken to 2 inch pieces
1 chopped or shredded, cooked chicken breast
salt and pepper to taste

1. Bring water, celery salt, parsley, and chicken bullion to a boil. Add chopped carrots and boil for 5 minutes with the lid on.
2. Add chopped chicken breast and noodles. Bring to boil and simmer until noodles are done, about 8 minutes. Keep the lid on to avoid losing all the broth as steam. If the liquid seems low, just add more water.
3. Add salt and pepper to taste. Enjoy!

*I should note that measurements are approximate. You can add more or less of ingredients to suit your taste and the thickness of the soup.

Wednesday, January 22, 2014

Whole Wheat Scones

I had the urge to make scones today (grandma H's recipe), but knew I needed to make them a little healthier than normal to try to justify it during pregnancy. So I adapted the recipe, and thought I would share. They seemed a little dry, but I think I just cooked them a little too long since it's harder to tell when they brown with the wheat flour. So, watch carefully.... once a toothpick comes out clean, get 'em out of the oven!


1. Combine:
3 c. whole wheat flour
3 T flaxseed
1/4 c. crushed/chopped almonds
1/2 c. sugar
2 1/2 tsp. baking powder
1/2 tsp. baking soda

2. Cut in until mixture resembles coarse crumbles:
6 T. cold butter, cubed (no substitutes)

3. Combine in bowl, then add the crumble mixture until just moistened:
1 c. vanilla yogurt or sour cream
1/4 c. milk

4. Knead in:
1 c. cranberries*
1 c. white or chocolate chips*

5. Bake
On a greased baking sheet, pat dough into a 9 inch circle. Cut into 8 or 12 wedges; separate wedges. Brush with milk to lightly coat tops of wedges. Bake at 400 degrees for 20-25 minutes or until golden brown. Serve warm.

*You really can add anything in that you would like- I like the scones with cinnamon chips, but you could try them with other kinds of dried berries or nuts.

Monday, December 2, 2013

Thanksgiving Week 2013

Nothing is better than being with family. Last week, my grandparents from California came in, who I haven't seen in over a year (shame on me!). Plus my sister and her husband and kids were here too. Dani's 2 1/2 and Jackson is 1 now. In fact, we kicked of festivities with a birthday celebration for him. Our friends Bill and Rita came over, as well as my cousin Janae.
With mom, grandma, and Bethany all there Wednesday morning, I didn't have much to help with on the  day-before prep. I had stayed home until late morning getting my own house cleaned up... it needed it! So when Thursday came, mom assigned me to make sweet tea, and that was my sole contribution to dinner, besides cinnamon rings. It was great to have everyone together. Mom and Dani made some cute edible turkey place settings, and we also all contributed the Thanksgiving acrostic.
 
Friday we a chill day. We just sat around and talked most of the day, besides the afternoon, when Bethany, Mike, Janae, and I went to see Catching Fire. It was the second time for Janae and myself. So many deep themes to ponder- I love it!
Saturday was the last day with the kiddos, so Justin and I took Dani shopping for a Christmas tree. She loves shopping is was absolutely great the whole time! We came home and I made her lunch- a peanut butter and marshmallow sandwich and kiwi fruit. Although Bethany gave me a hard time for introducing this type of sandwich, I really don't see how grape jelly and marshmallows are that different nutritionally.... ;) It was great to spend some time with Dani, and it reminds me of how fun it will be to have my own. I'm four months along now, but it seems like it is taking forever in some ways!!

Thursday, July 25, 2013

How to can green beans

Lately I've been canning lots of beans. You can't imagine the nostalgia that this brings about. Except now, I have to plant them, weed them, pick them, snap them, wash then, stuff them in jars, and monitor the pressure cooker all by myself. (Ok, take that back mom did get me started with the first canner) When I was a kid, dad, mom, Beth, me, and Zach all pitched in somehow, and the process seemed less tedious. Still, the work that goes into preserving beans is much more manageable than peas. The thing is, for the amount of pea pods that you pick, not many actually turn out, and it takes a lot longer to shell them! So back to the beans....
To can beans, you should first snap the ends off, in my opinion, and then break the bean into about a 2-3 inch portion so they fit into the jar. Once you have them down to size, you will need to rinse them in water several times to make sure that any dirt is gone. Very important step! Next, I recommend wide mouth Ball canning jars to store them in. Begin to put the beans into the jar, and then use the blunt end of a knife to pack them in as much as desired. (As a kid, we tried to pack them in good to get the most use out of the quart) Put one teaspoon of salt in each jar for flavoring, and wipe the rim of the jar clean of any water or salt.
Meanwhile, fill a stockpot with water and get it boiling. Concurrently, put three quarts of water in the pressure cooker and turn up the heat so it won't take as long to process once you get the jars ready.
In the stockpot of water, place as many lids as you will need into the water, as this helps get the seal ready. Leave them in for 5-10 minutes, then take them out and put them on the jars. Add and tighten the rings to help seal the lids before they go into the pressure cooker. Once the lids and rings are all on, place as many jars as will fit in your pressure cooker. (Mine holds 7 jars)
Place the lid on the pressure cooker. Once you feel steam coming out of the topper, set the timer for 5 minutes. After 5 minutes, place the topper on and watch for the pressure gauge to rise to 15 units. Once it hits 15, set the timer for 15 minutes. Keep an eye on it, because you should adjust the burner heat if the pressure goes higher than 15 units. When the timer ends, turn the burner off and wait several hours at least for everything to cool.

Well, that certainly sounds like a long process, and it is in a way, but the more I do it, the faster it gets. The best part is having homegrown beans any time of the year, without all the extra crap that you find in store beans. They last a long time too! I'm pretty sure I've eaten beans from two or three years ago, and they tasted just the same. So it's worth it, for sure!!

Sunday, June 16, 2013

Making Strawberry Freezer Jam

Making strawberry freezer jam wasn't as hard as I thought. Of course, they probably have to test the directions on a bunch of people before they print them, but still, I was pleasantly surprised that all of my jam set up like it was supposed to in the 24 hour waiting period before I put it in the freezer to store. The hardest part (or most tiresome) is actually cutting and mashing the berries up. Mine were freshly picked from my parent's patch, but they had a few spots to work around and you are supposed to mash them with a potato masher, one cup at a time. (My arm is now sore, but for the record I did two cups at a time and it worked fine)  Still, it was worth the effort and I did four batches. Not all of them are even in the picture.


I also tried the less-sugar needed recipe, which calls for Splenda. But it's not a freezer recipe, it is a cooked recipe. I personally don't like that as much, but it is a ton less sugar (twelve small packs of Splenda compared to four cups of sugar). So it does help in that aspect. All in all, I will stick with the freezer jam, or maybe look up another recipe for less sugar that is a freezer jam recipe. Those just seem fresher when you actually use them.

Thanks for a successful canning session, Sure Jell.

Sunday, April 21, 2013

Such a foodie...

It's probably pretty easy to tell that I'm a foodie. I love my food! So does Justin, so that's a bad combination for our waistlines... Even with that, I think we are supposed to enjoy our food, just in moderation.

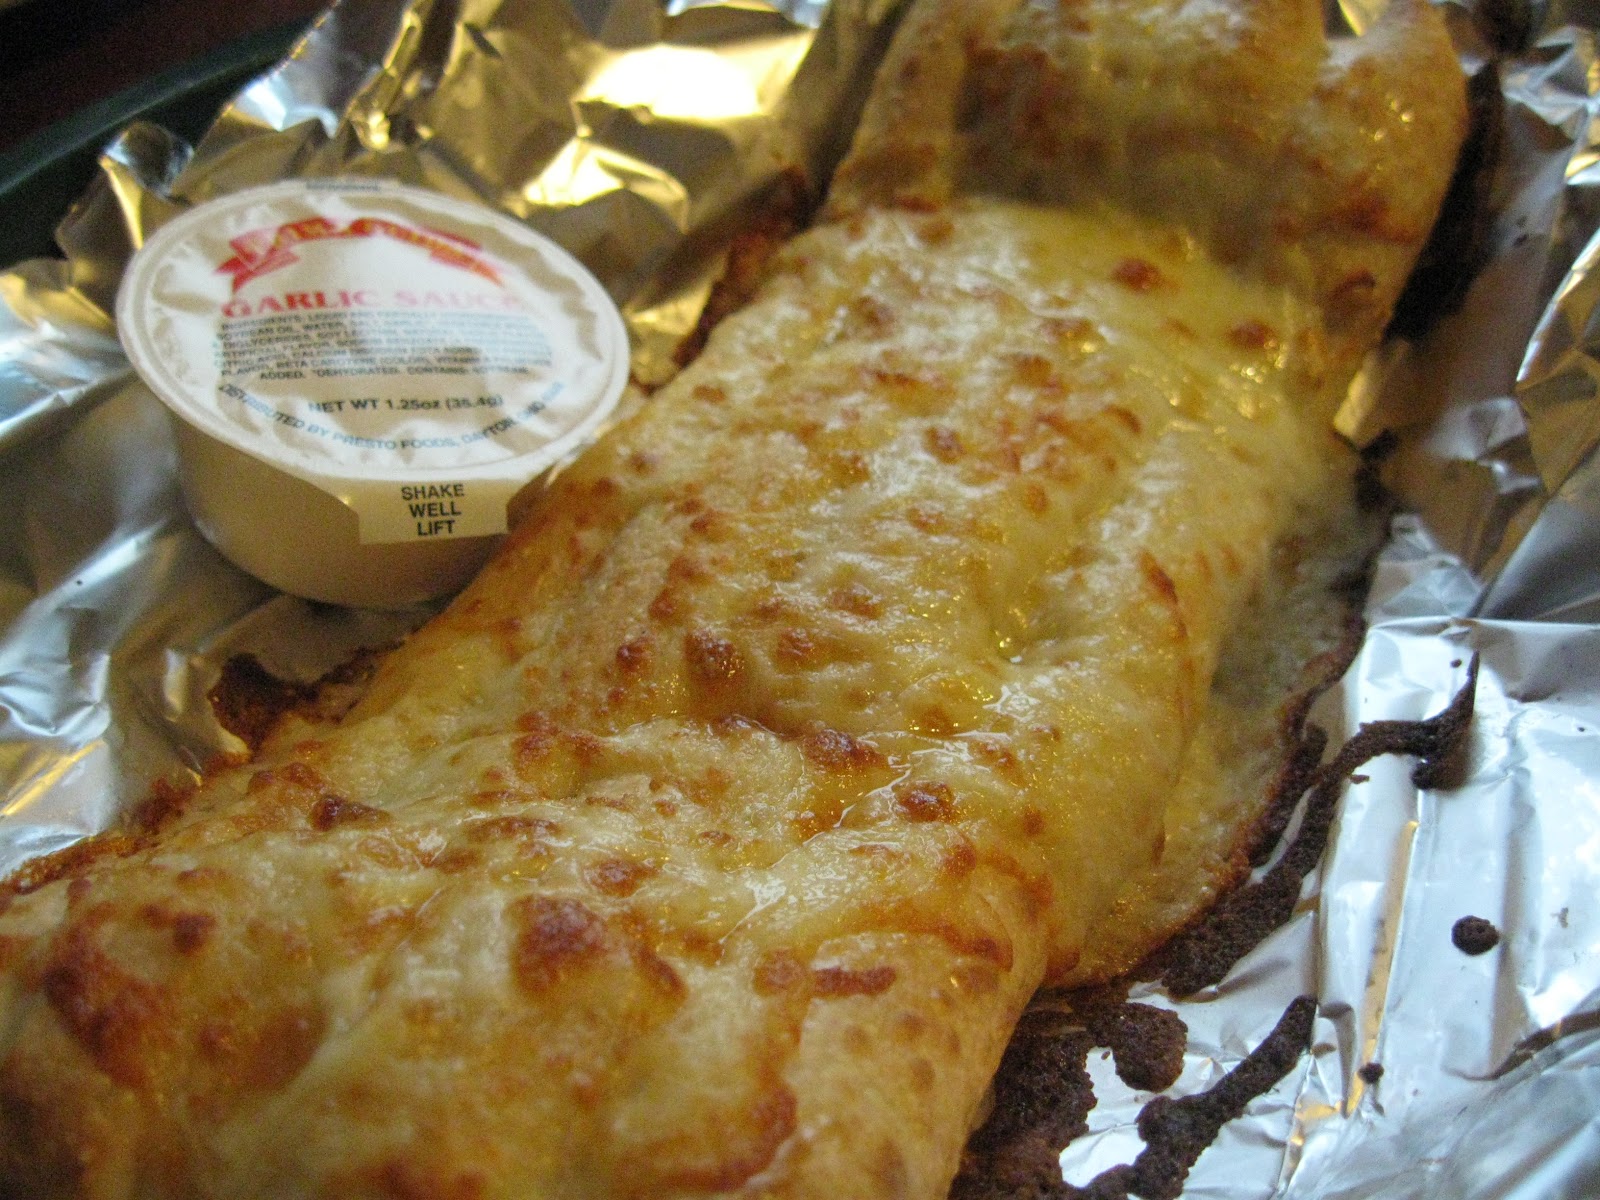
Well, we hadn't been to Colonial's in Cedarville since college... about five years. I'm sorry that we waited so long. We ordered a ham, bacon, and sausage, and it was delicious! The bread sticks are as good as ever too. They remodeled the inside a little bit, and that all looks great too. Why hasn't this place been featured on Diners, Drive-Ins, and Dives?


Then on Thursday, I made what I'm dubbing The Reese's Cake. I made a chocolate cake mix and added evaporated milk, a pudding mix, and the regular requirements for everything else. After baking it, I whipped up some peanut butter icing. It was great because it wasn't too peanut-buttery. I got it from a recipe book my grandma H. gave me called "Cake Mix Magic." The icing was just right- not too peanut-buttery but still enough. I finished it off with mini Reese's on top. YUM!

Saturday, April 6, 2013

Happy 21st Zach!

I love my little brother and that's a fact. No matter what.

So I got with one of his good friends to organize a surprise party. The problem is, Zach is so stubborn that he wouldn't "drop by" when I texted him, so it ended up being not so much of a surprise. But that doesn't matter, he still got here and it was fun to hang out with everyone. I love hosting too, so it was a treat for me too. We kept it simple: hot dogs and smoked sausage on the grill, baked beans, homemade mac n cheese, chips, pop, and cake. But oh, the cake!!

Zach likes red velvet cake, so that is what I made. I wanted to keep it simple, so I used a devil's food cake mix, and added a packet of pudding to make it moist, along with buttermilk substituted for the water. To make it red, I added one ounce of red food coloring. Perhaps I could get away with a little less than one ounce, but it does cook out some, and it needs enough to take over the chocolate color. I made two batches because I wanted to have enough for cupcakes and a cake.

The icing is simple too: 1/2 cup butter, 8 oz cream cheese, and 3 tsp of vanilla creamed, then add about 3 1/2 cups powdered sugar. I made a triple batch, and had to whip it for a while to get all the powdered sugar in. But it turned out great! It is just the right sweetness to complement the chocolate (and red dye). It also set up nice and wasn't too sticky.

I used my new icing set, a Christmas present from my mother-in-law, to frost the cupcakes. For the cake, I didn't ice the edges so that I could show off the red velvet cake. I finished all of them off with chocolate gratings. So delicious!